Intercepting iOS traffic with Burp Suite
If you're getting started with iOS penetration testing, one of the first things you'll need to learn is how to intercept traffic from an iOS application. In this guide, I'll show you how to configure Burp Suite and an iOS device so you can start inspecting requests coming from mobile apps.


Overview: What do we need?
Essentially, to start intercepting the traffic coming from your iOS applications, you'll need:
- Burp Suite installed on your computer.
- An iOS build/app with SSL pinning disabled.
- A bloody iOS device.
- Obviously, the application to be tested already installed on your device.
- The PortSwigger Certificate Authority (CA) downloaded and configured on your device.
SSL Pinning? Wondering why you'd need it disabled? Oh my child... just continue reading.
What is SSL Pinning in mobile applications?
When an application communicates with an API server, it uses SSL/TLS encryption. To establish trust, the application checks the server's certificate against the list of trusted Certificate Authorities (CAs) stored on the mobile device.
This presents a security risk because you can upload any Certificate Authority to your device, and the application will trust it by default. That means you could potentially intercept and sniff all the device traffic.
SSL Pinning was introduced to fix this problem. Instead of trusting any CA installed on the device, the app only trusts specific certificate public keys that were hardcoded into the application by the developers before release.
Meaning that if the app doesn't trust your Certificate Authority when you try to intercept traffic… you won’t see sh*t.
I mean… you’ll see absolutely nothing of what’s happening in the background.
So again, having this feature disabled in the build we are testing allows us to easily inspect the application's traffic, because it will trust any certificate we install locally. When pentesting, you can usually ask the developers to disable this feature before they provide you the build.
Well, there are ways to bypass the check, this is called SSL Pinning Bypassing, but it usually takes significantly more time. And many times our testing effort needs to focus on other areas.
How to install PortSwigger CA on your iOS device
You can follow the instructions in the official PortSwigger documentation, or follow these steps:
- Export the certificate from Burp.
- Download it and push the certificate to your device.
- Open Settings and select Profile Downloaded.
- On the Install Profile screen, tap Install.
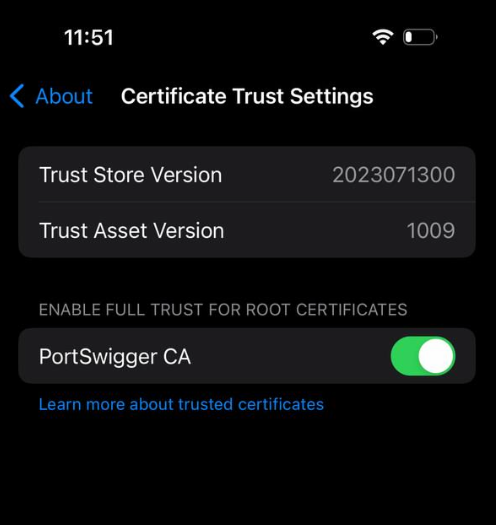
- Then go to Settings → General → About → Certificate Trust Settings.
- Enable the toggle for PortSwigger CA.
How to intercept IOS traffic? Burp Configuration
You can either add a new listener or modify the one that comes by default.
The key here is configuring Burp Proxy to listen on all interfaces (*). This allows Burp to receive traffic coming from outside the localhost environment, including your mobile device.

How to intercept IOS traffic? IOS Configuration
These steps are quick and simple. We’re almost done, and soon you can start the fun part: testing!
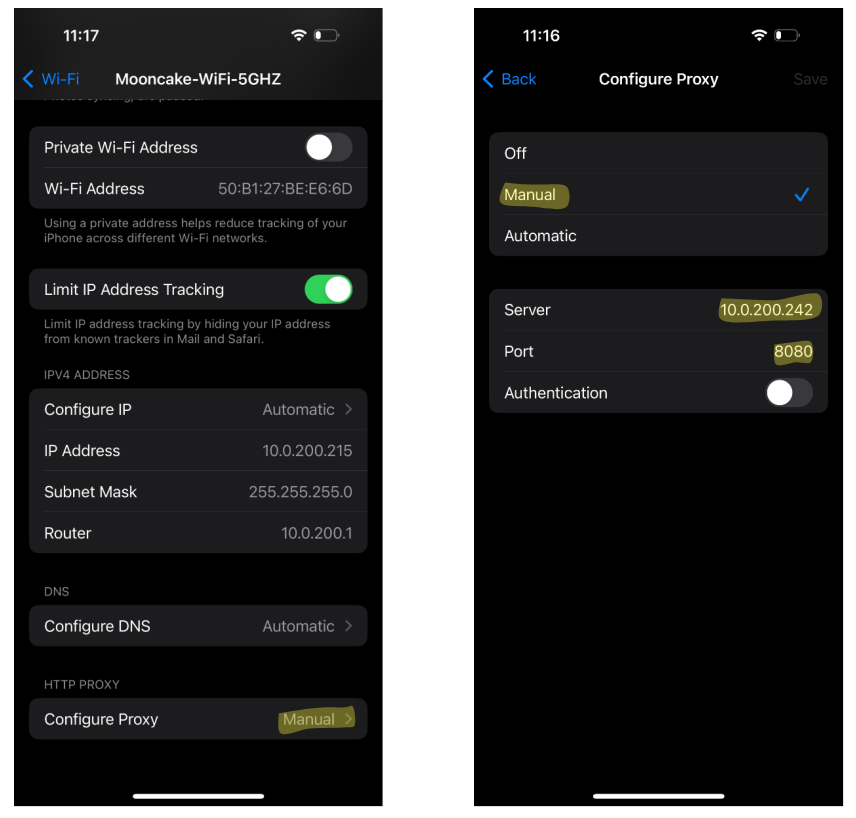
- Make sure your device is connected to the same Wi-Fi network as your computer.
- Go to the network configuration and add a manual proxy.
- Enter your computer’s private IP address and the port configured in the Burp listener.
... and what now?
Now you should have everything you need to start seeing traffic in Burp.
Open any web page or start using the app you want to test. If everything is configured correctly, you should see incoming traffic populating Burp’s interface.
Congratulations! You did it.
Conclusion
Now you can start your journey into iOS penetration testing or bug bounty hunting.
Pretty easy, right?
Happy hacking!
Let’s see if this becomes the start of a new iOS series in The Hacking Diaries.