Hack the Box Journey: Tier 0 + Port and Dir Enumeration
A quick breakdown of what I learned during Hack The Box Tier 0: how to enumerate ports, explore common services like FTP, SMB, Redis, and more, plus basic command-line tips to kickstart your reconnaissance. Notes to myself—and maybe helpful to you too.


On my CyberSecurity Journey for 2025, I shared that I won a month of Hack The Box VIP+ subscription. So, in order to make the most out of it, I put together a month-long study plan—because that's all we get. I'm a poor woman.
So here I am, writing this down for future reference. Maybe this can help you too, future CyberSecurity Researcher, to shape your own study plan. Or maybe you're just here for the quick cheatsheet (honestly, same—this blogpost exists partly because I needed one). Either way, you're more than welcome.
Where did I start?
Well… from the beginning. Hack The Box recommends going through Tier 0, Tier 1, and Tier 2 before moving on to other labs. And I’ve got to say, the memory refresher was actually pretty great. Mostly because I was already familiar with the clients and technologies—but it’s been a while since I last touched them as a developer. So, I figured the best approach was to revisit the basics.
What did I learn from Tier 0?
A lot about how different services work, anonymous logins, and how to use Nmap for initial port scans.
Port Enumeration
When starting a penetration test or any security evaluation on a target, one of the first steps is Enumeration. This means collecting as much info as possible about the system—like which services are running on which ports and what kind of vulnerabilities might be present.
For that, as you may know, we use Nmap
nmap -sC -sV <target's ip>

# -sC runs some scripts to highlight vulnerabilities.
# -sV retrieves the service information.
# This will scan the 1000 most used ports, however, if you want to check all 65.535 ports, you can add the -p- flag
# The --min-rate could also be added to specify the minimum number of packets that nmap should send per second; it speeds up the scan as the number goes higher.

nmap -p- --min-rate=100 -sC -sV <target's ip>
From this initial scan, depending on the Box we are working on, a different service will appear.
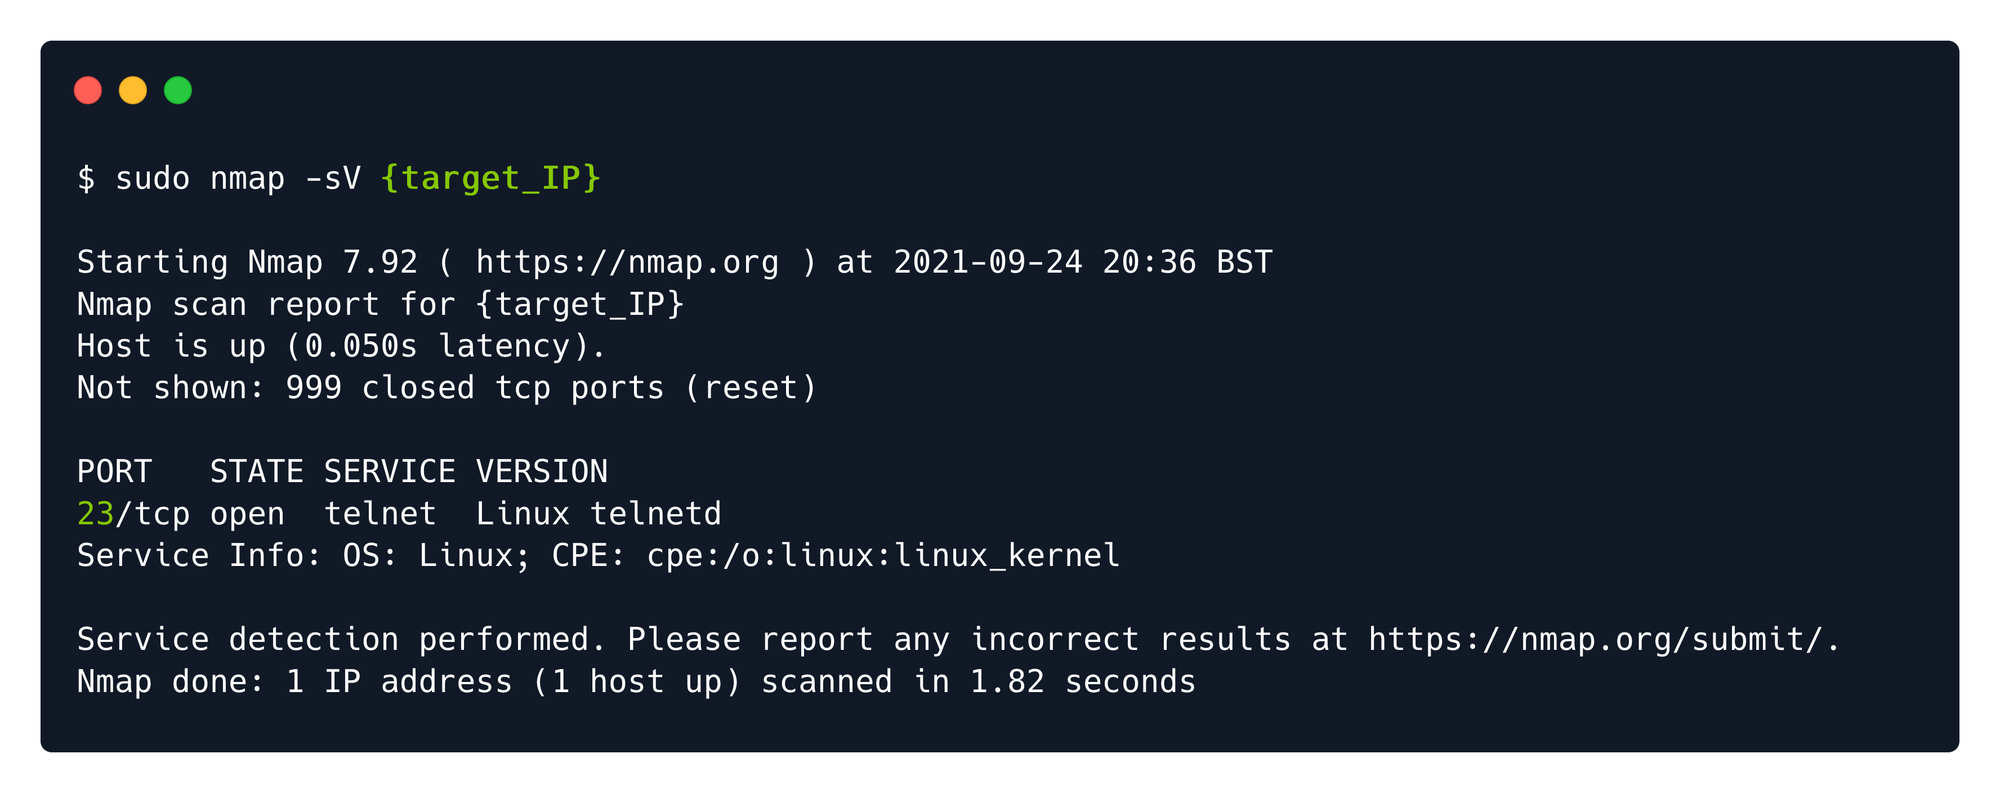
Port 23: Telnet
For example, a telnet service will appear open on port 23. Telnet is an old service used for remote management of other hosts on the network.
You can use the telnet client by using your terminal, but you'll be asked to provide credentials.
telnet <target's ip>
However, due to configuration mistakes, some accounts can be left with black passwords for the sake of accessibility, like 'admin', 'administrator' or 'root'.
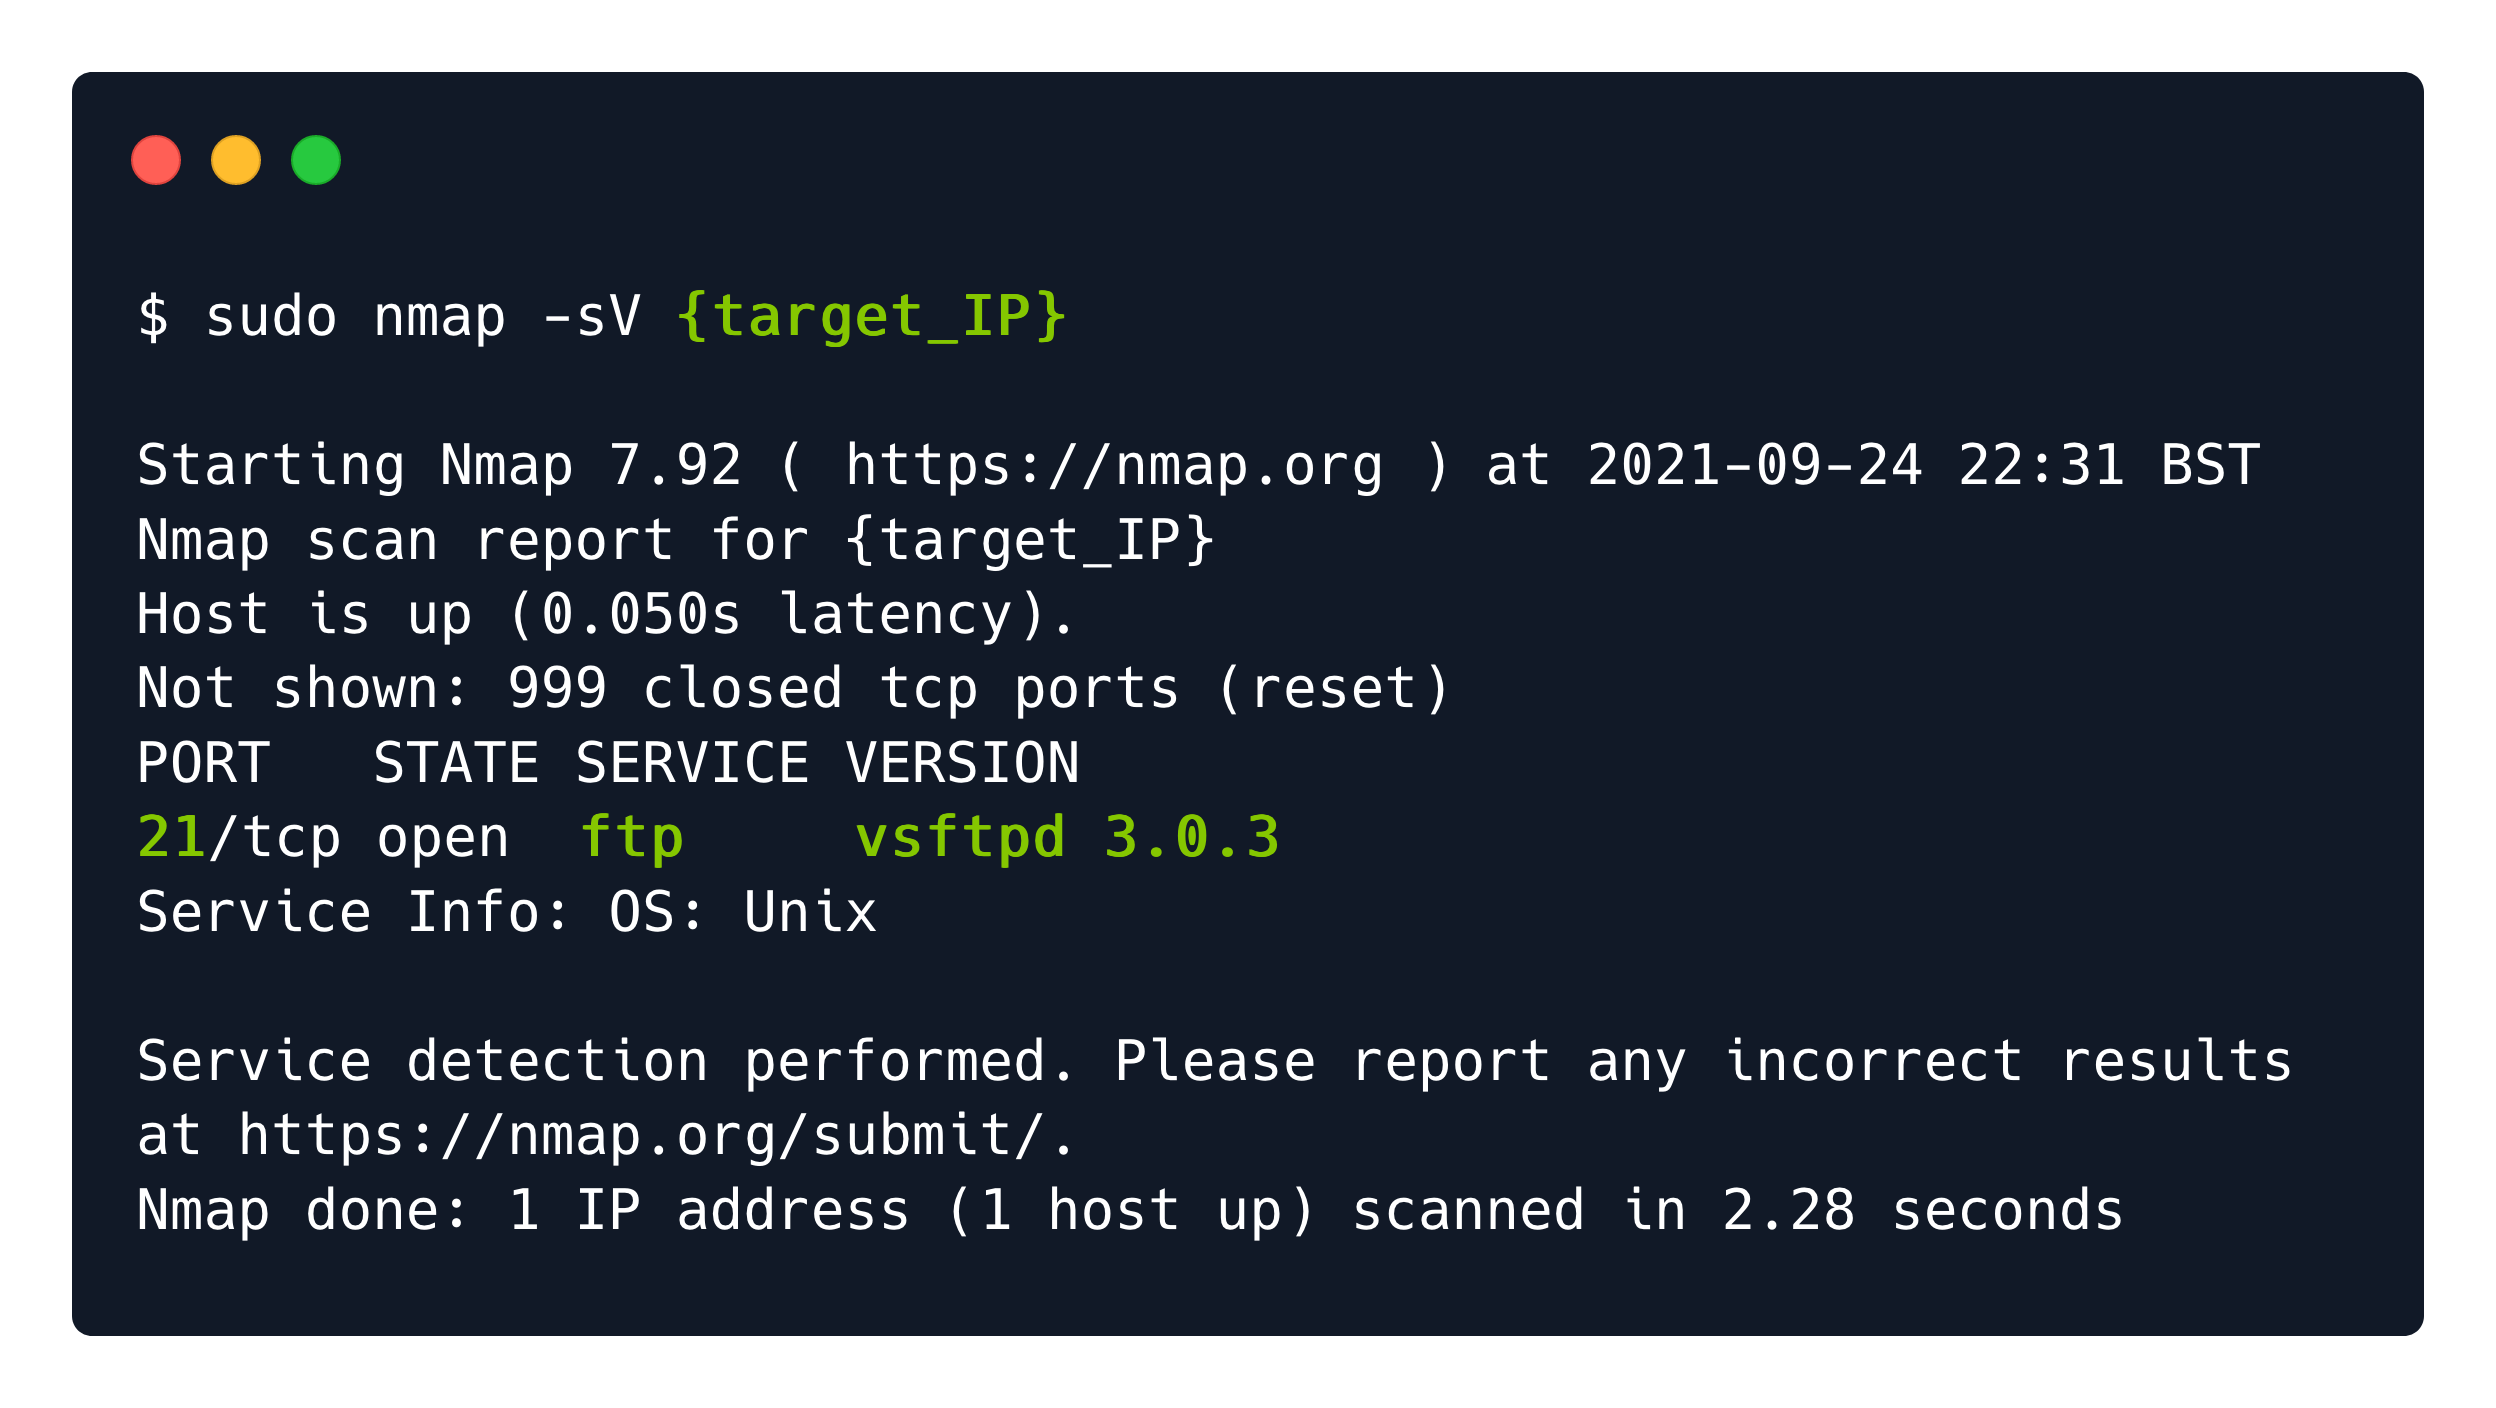
Port 21: FTP
On port 21, you will find FTP service that may have high chances to be poorly configured.
The File Transfer Protocol is a standard communication protocol used to transfer computer files from a server to a client or vice versa. The trick here is that FTP users need to authenticate themselves, however, I can connect anonymously if the server is configured to allow it.
ftp <target's ip>
When you are prompted for a username, type 'anonymous', followed by any password whatsoever since it will be disregarded.
You can then browse files and download them with ls and get commands.
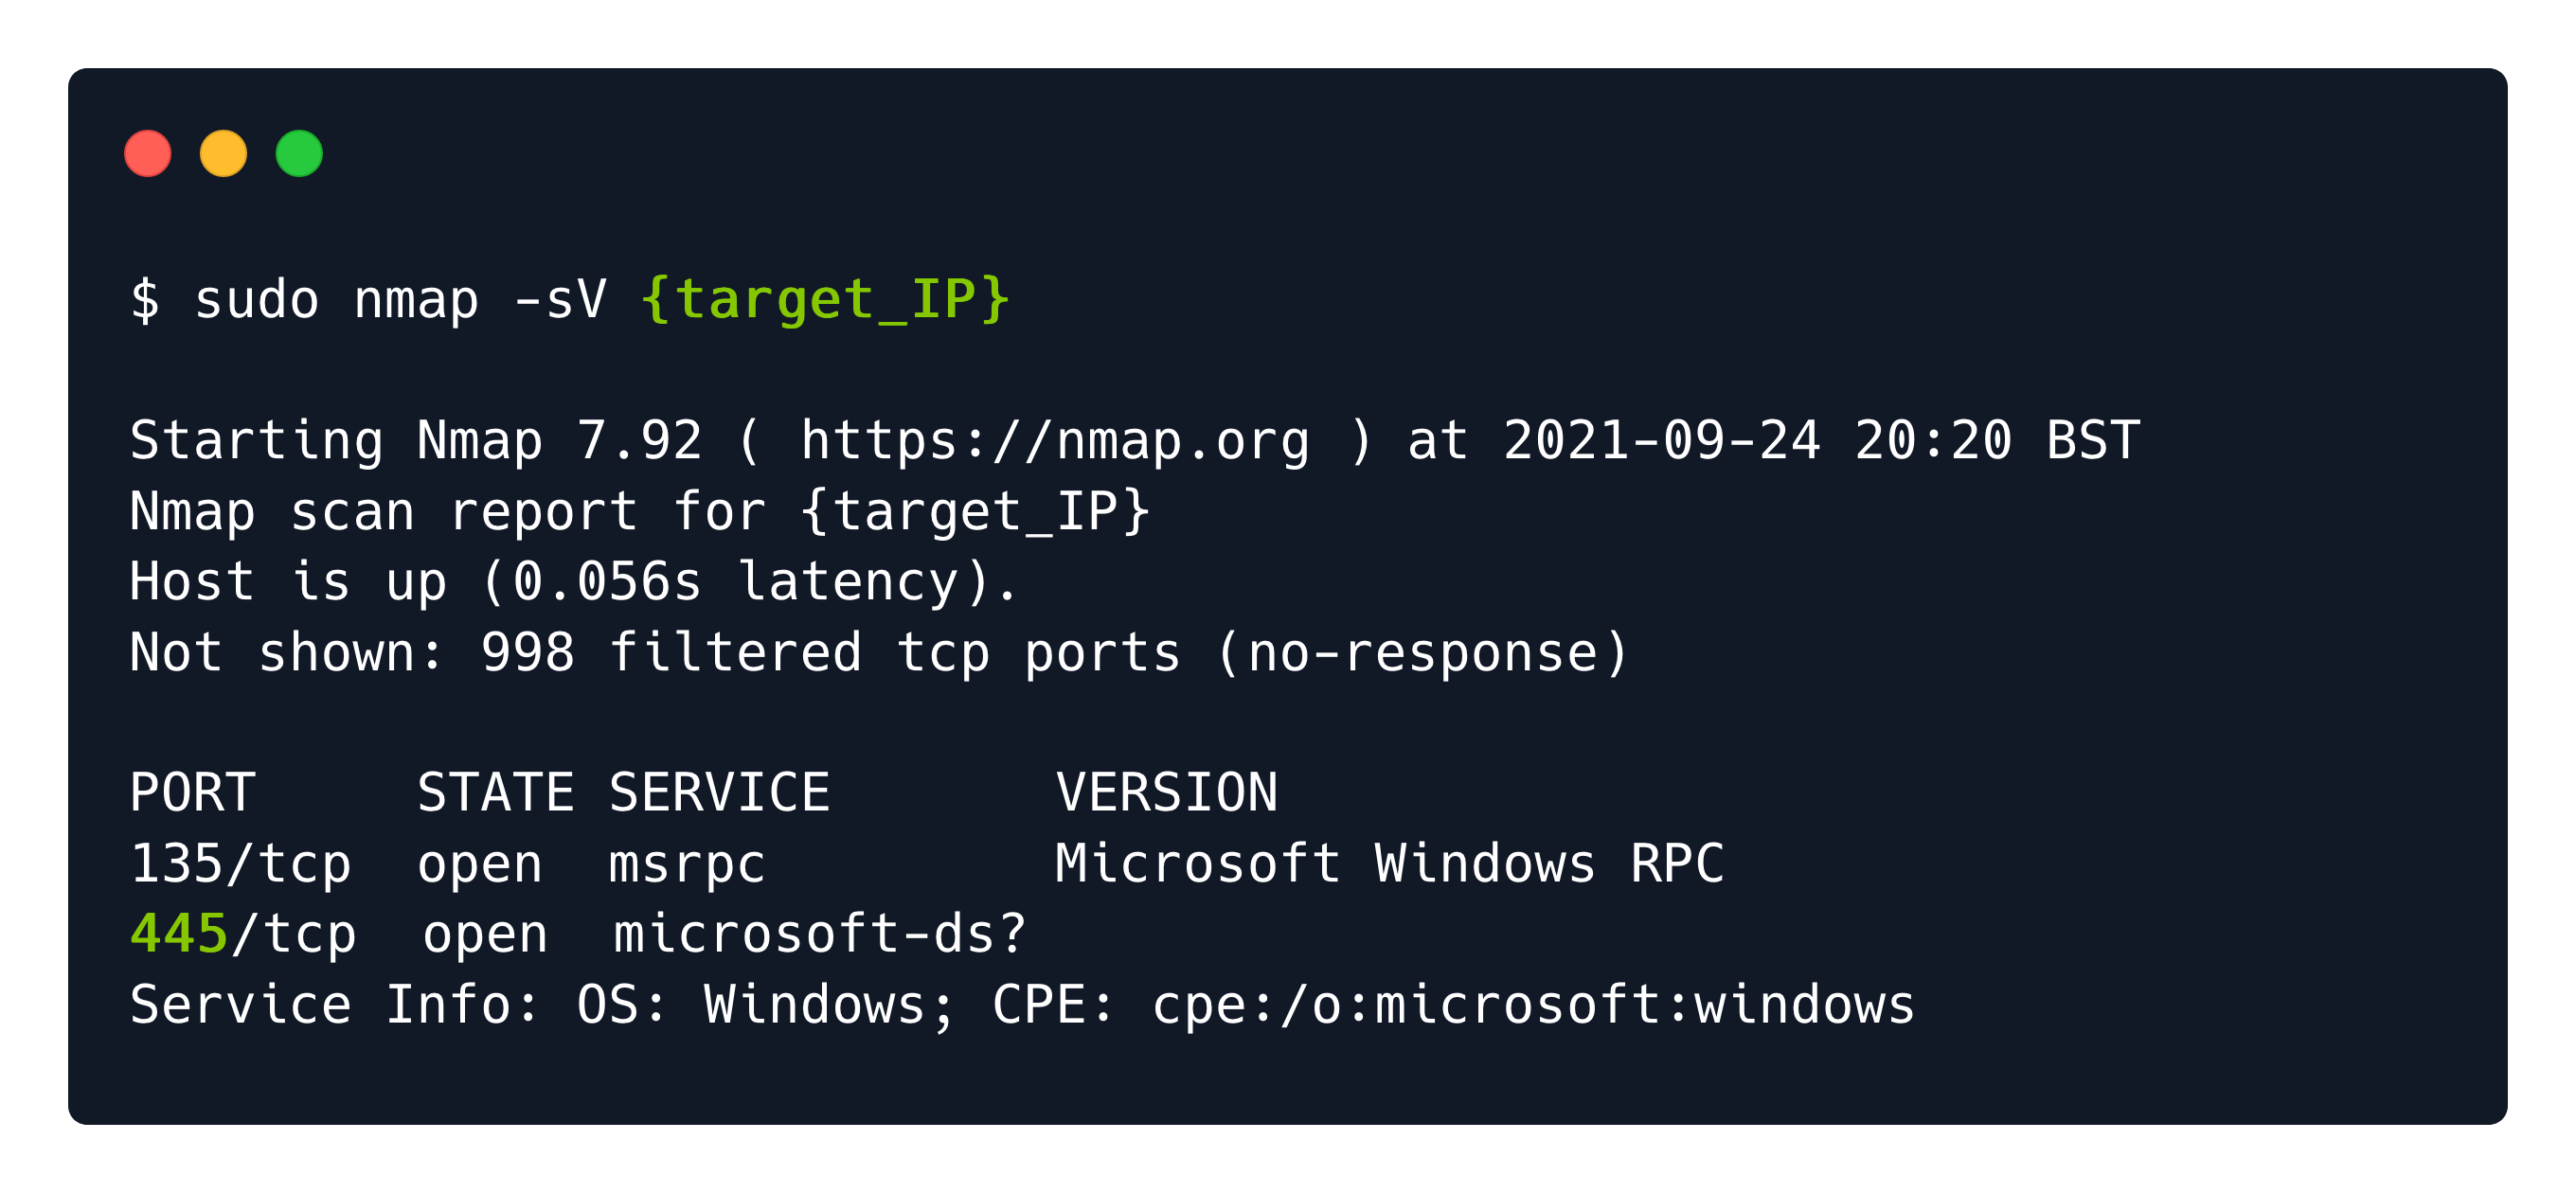
Port 445: SMB
There is another way to transfer files between hosts on the same network, that is using SMB (Server Message Block). And you will encounter it on port 445 of Windows targets.
This communication protocol provides shared access to files, printers, and serial ports between endpoints of a network.
An SMB-enabled storage on the network is called a share. These can be accessed by any client that has the address of the server and the proper credentials. However, we may need to look for a guest account or anonymous log-ons.
In order to successfully enumerate share content on the SMB service, we can use a client from the terminal called smbclient.
smbclient -L <target's ip>

# -L will list the shares on the target without connecting to any
Running the command above, we see that four separate shares are displayed. Let us go through each of them and see what they mean.
- ADMIN$ - Administrative shares are hidden network shares created by the Windows NT family of operating systems that allow system administrators to have remote access to every disk volume on a network-connected system. These shares may not be permanently deleted but may be disabled.
- C$ - Administrative share for the C:\ disk volume. This is where the operating system is hosted.
- IPC$ - The inter-process communication share. Used for inter-process communication via named pipes and is not part of the file system.
- WorkShares - Custom share.
We proceed with attempting to log in to the custom WorkShares SMB share. This seems to be human-made, thus prone to misconfiguration.
smbclient \\\\<target's ip>\\WorkSharesOnce connected to a share, you can navigate through it using ls, cd, get and exit commands.
Port 6379: Redis
There are different types of databases and one among them is Redis, which is an 'in-memory' database, meaning that the database is managed in the RAM of the system; in contrast to databases that store data on the disk or SSDs.
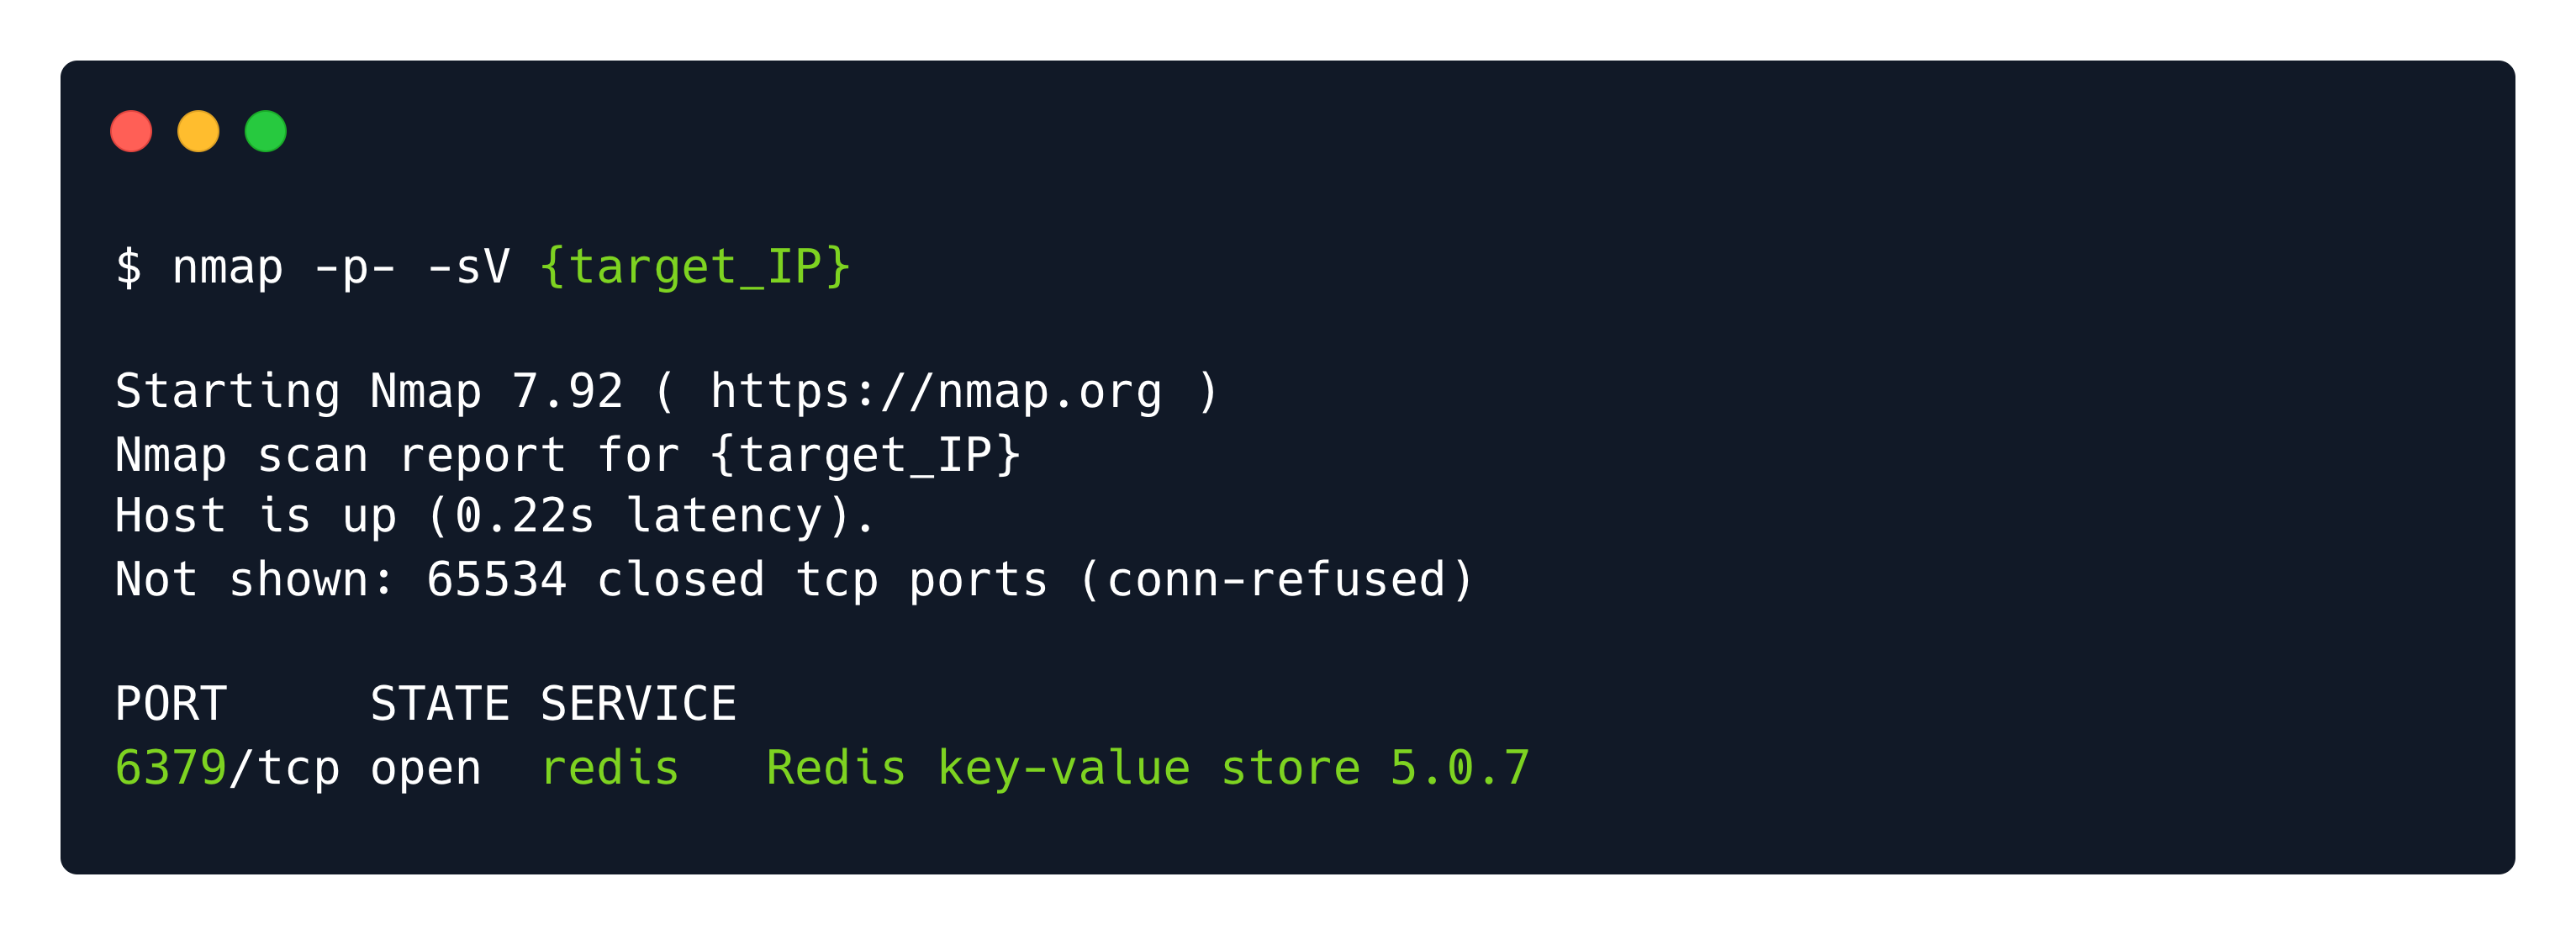
On port 6379 you will find Redis (REmote DIctionary Server) is an open-source advanced NoSQL key-value data store used as a database, cache, and message broker. The data is stored in a dictionary format having key-value pairs. It is typically used for short term storage of data that needs fast retrieval.
And we can connect to it using the redis-cli on the terminal.
redis-cli -h <target's ip>One of the basic Redis enumeration commands is info which returns information and statistics about the Redis server.
The keyspace section provides statistics on the main dictionary of each database. The statistics include the number of keys, and the number of keys with an expiration.
In our case, under the Keyspace section, we can see that only one database exists with index 0 .
Then we can use the select 0 command to pick the database; keys * to list all keys present in said database; and then get <key> to view the value stored in a particular key.
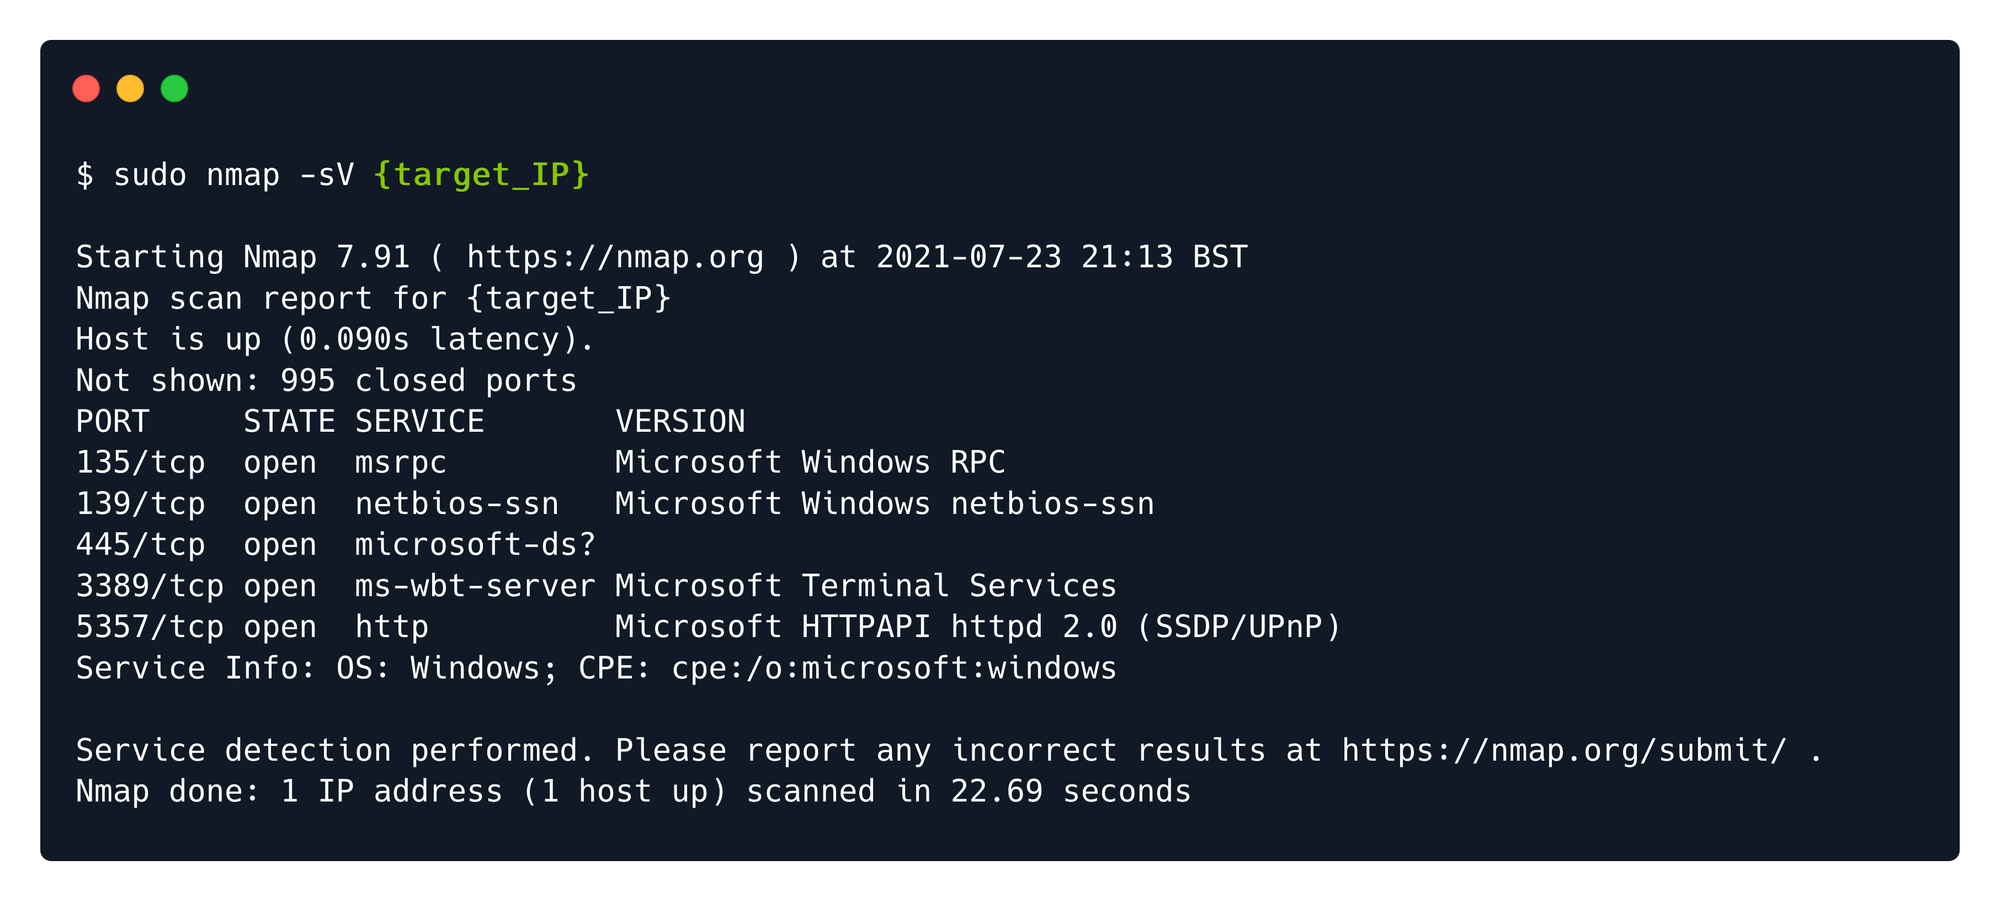
Port 3389: RDP
The Windows Remote Desktop and Remote Assistance connections using Remote Desktop Protocol can normally be found on port 3389 TCP and port 3389 UDP. The only difference is how the information is presented to the end-user.
In order to see the remote host's display, we can sort to command line tools like xfreerdp and check if guest or anonymous connections are allowed by the misconfigured service. We can try default accounts like User, Admin, Administrator and so on. When prompted for the password, we can try to leave it empty or try the most used ones.
xfreerdp /v:<target's ip> /cert:ignore /u:Administrator

# Where /cert:ignore specifies to the script that all security certificate usage should be ignored.
# /u:<user> specifies the username for login.
# /v:<target> specifies the host's ip to connect to.
Port 80: HTTP
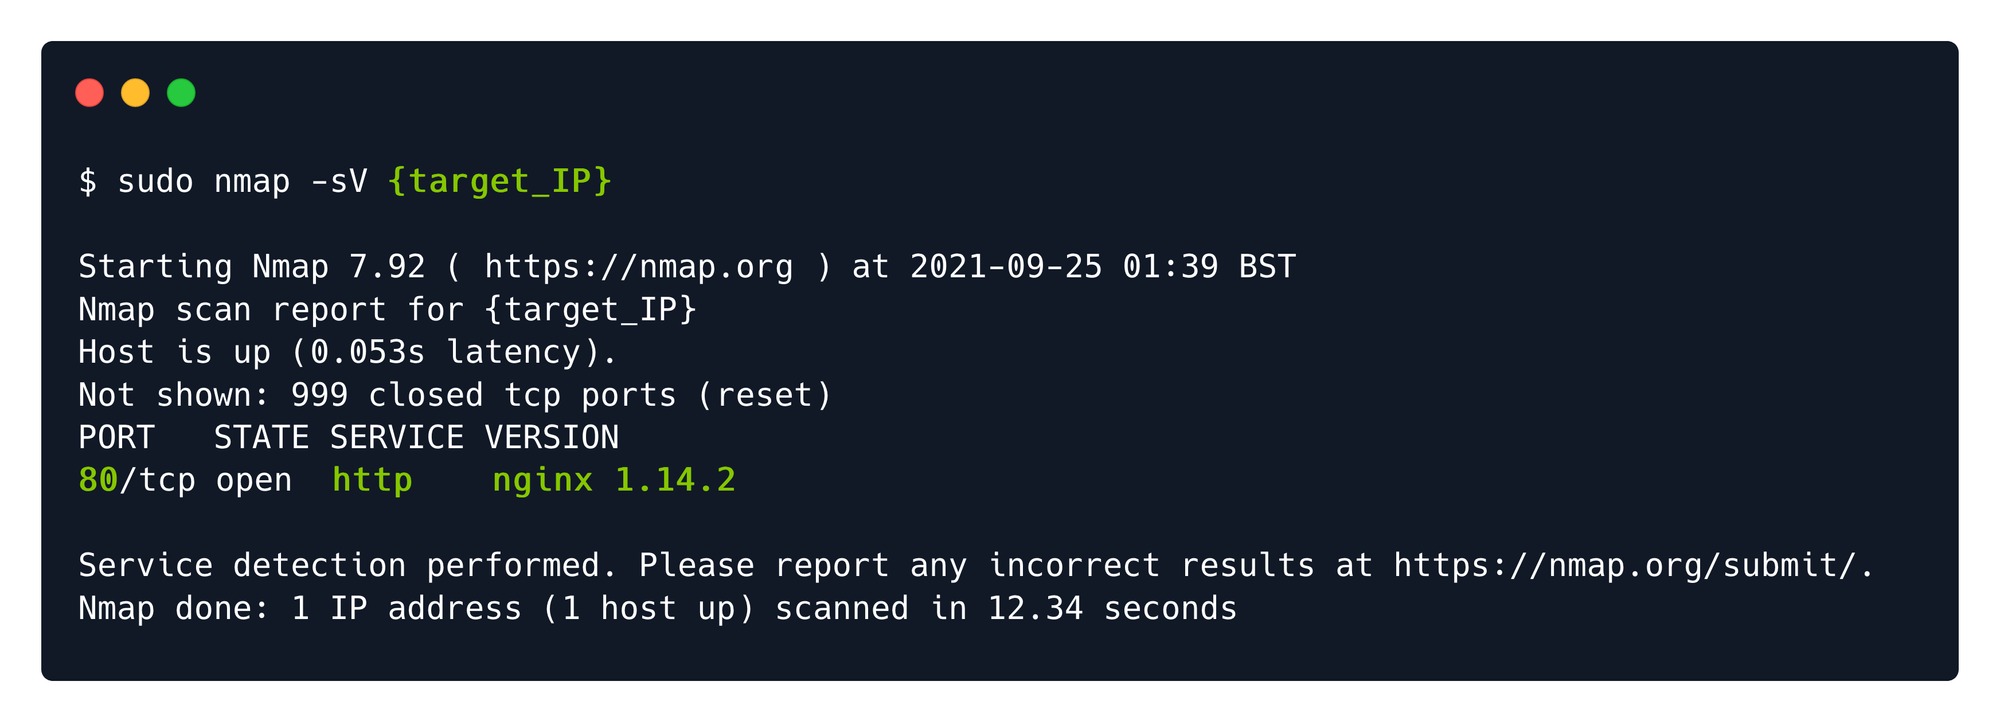
Web servers time! How fun!
I found an ngnix service exposed on port 80, so I conclude the target is a web server. Web server have the sole purpose of serving web content for internal or external users.
So I opened the browser and typed http://<target's ip>:80 a hit enter. I encountered the default post-installation page for nginx service, meaning that most probably the web application might not be adequately configured yet, or that default credentials are used to facilitate faster configuration up to the point of live deployment.
To avoid guessing URLs manually through the browser's search bar, we can find
a better solution called directory busting. For this purpose, we will be using the tool called gobuster , which is written in Go.
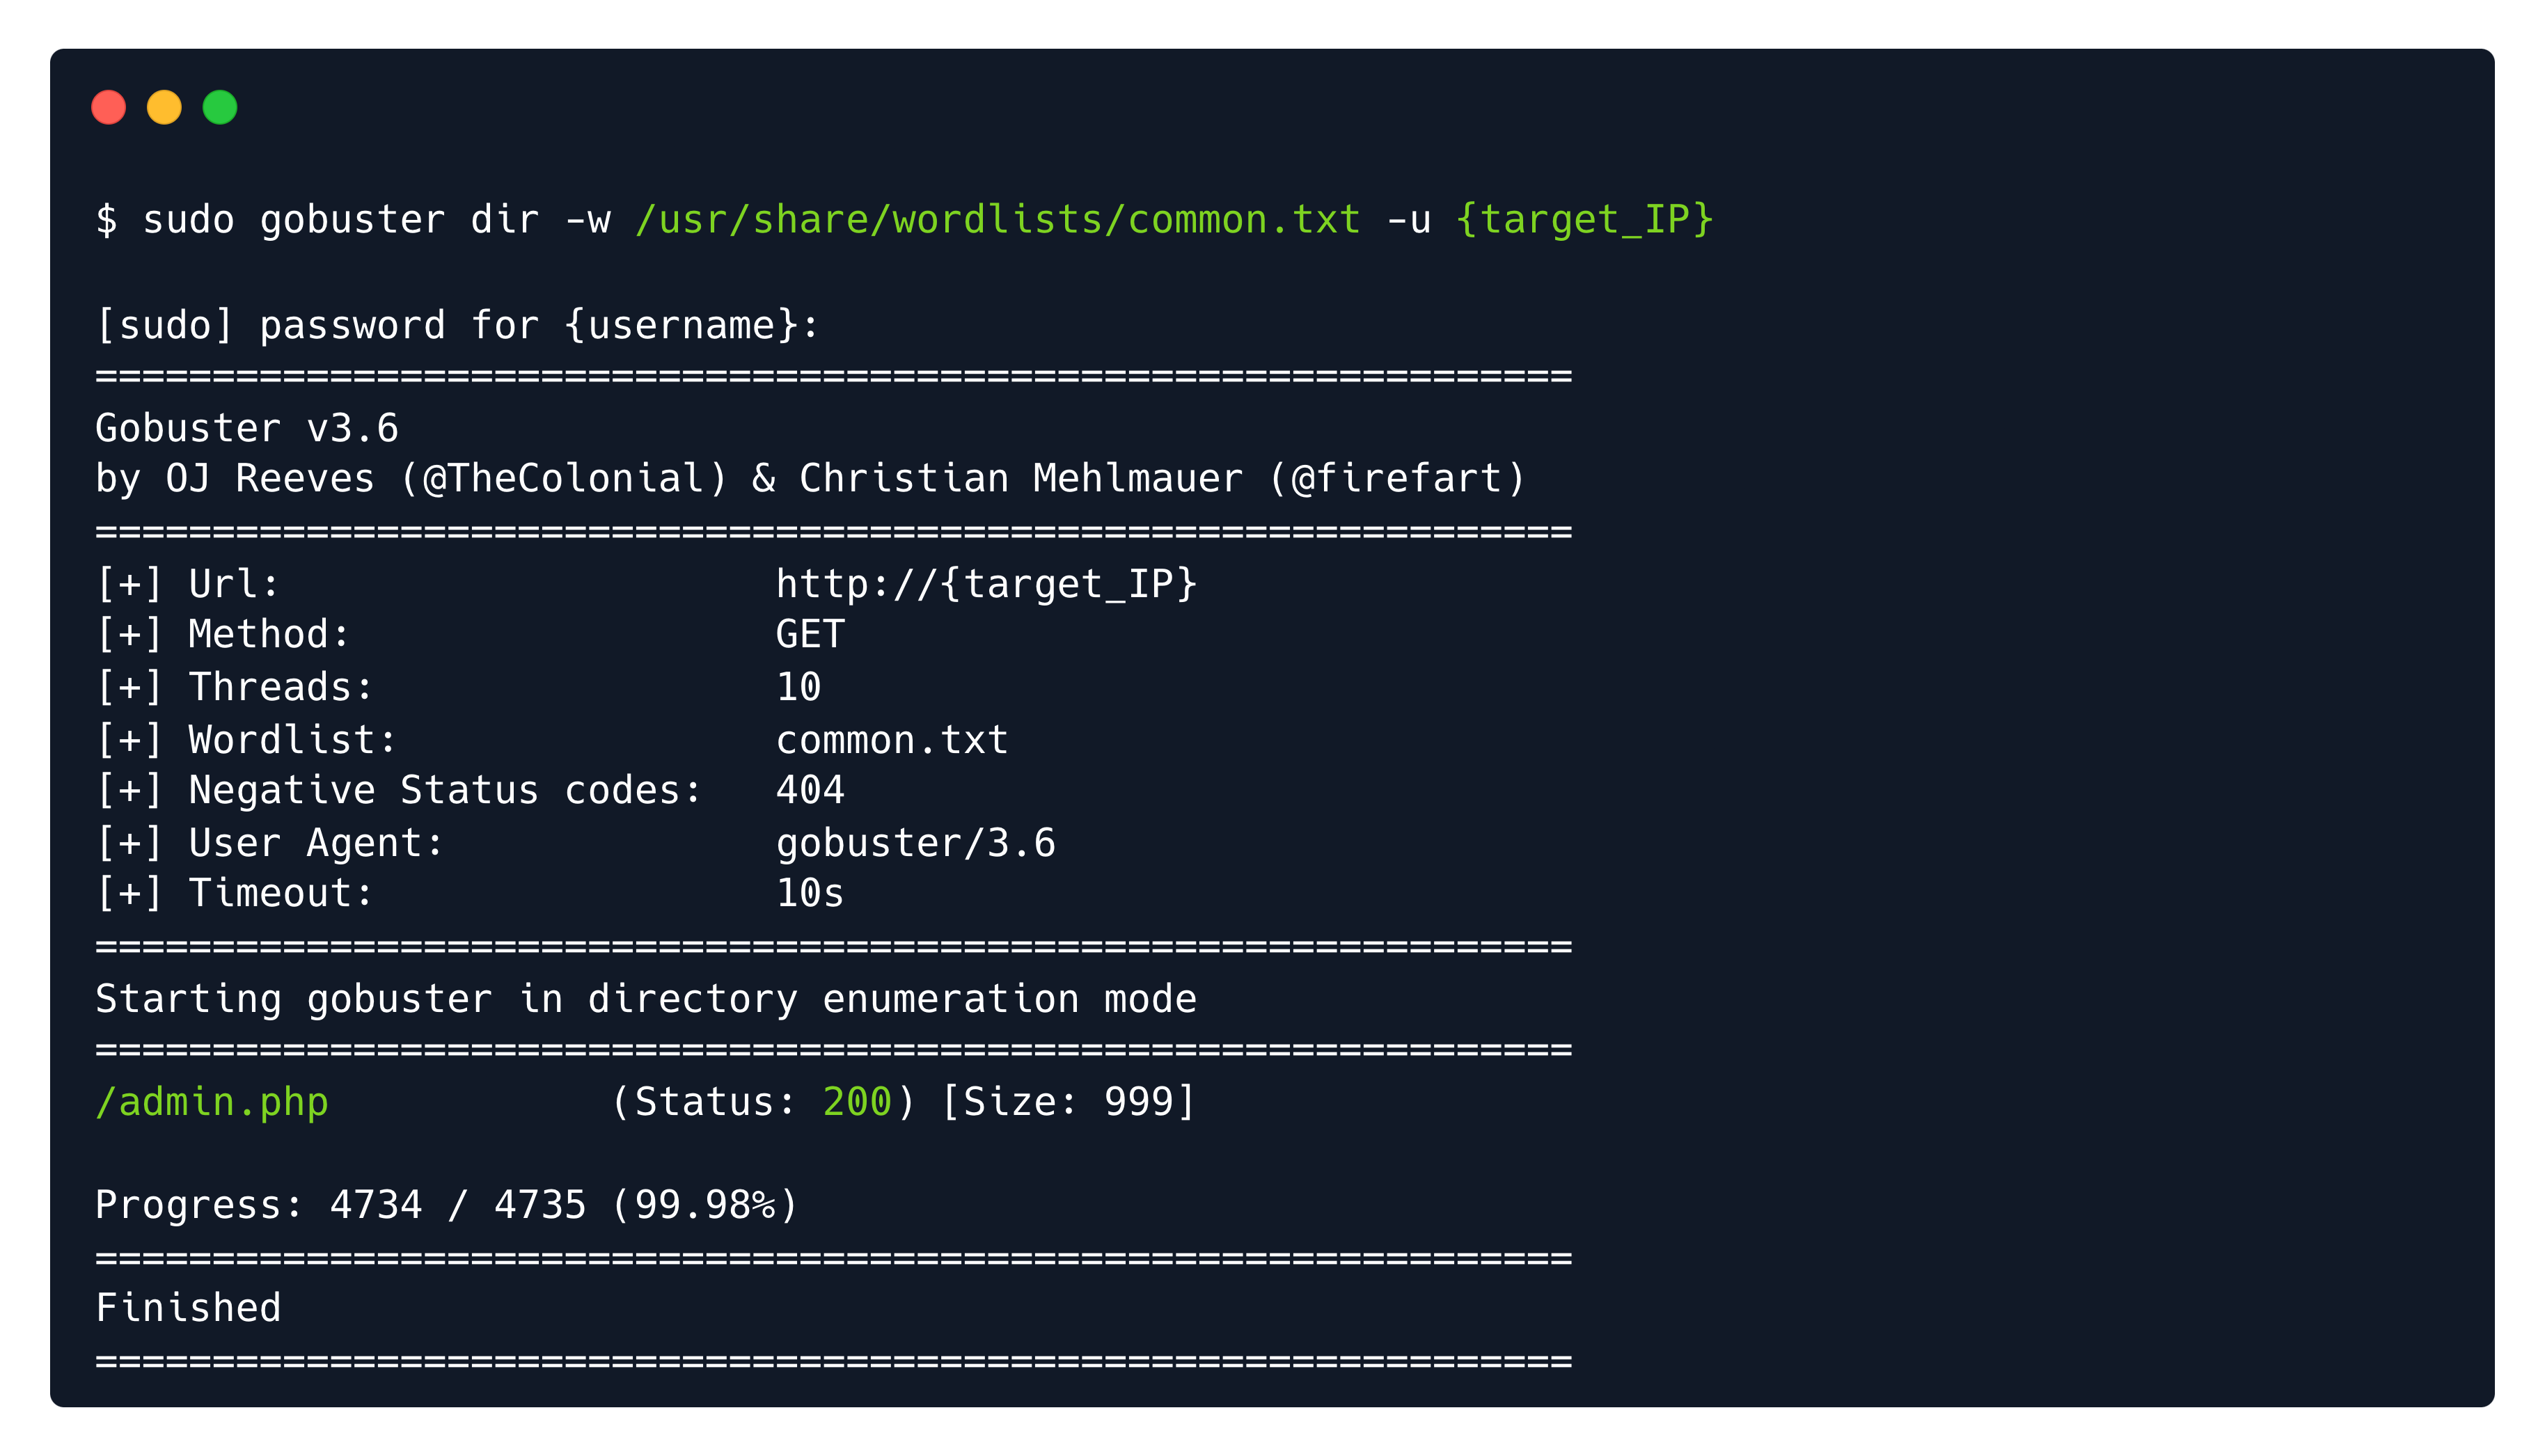
Dir Enumeration
We'll use gobuster alongside SecLists, which will provide the wordlists for dir busting.
git clone https://github.com/danielmiessler/SecLists.git

gobuster dir -w ./SecLists/Discovery/Web-Content/common.txt -u <target's ip>

# dir -> specifies we are using the directory busting mode of the tool.
# -w -> specifies a wordlist, a collection of common directory names that are typically used for sites.
# -u -> specifies the target's ip address.
Out of all the variations found in the wordlist we specified, the Wordpress admin.php page existed and was returned to us in the output as seen below, signaling that the webpage exists and we can navigate to it manually to check out its contents.
We go there, try some common username/password pairs, like admin/admin and try to get the flag.
Port 27017: MongoDB
There are different types of databases and one among them is MongoDB, which is a document-oriented NoSQL database. In a document-oriented NoSQL database, the data is organized into a hierarchy of the following levels:
- databases
- collections
- documents
Databases make up the top level of data organization in a MongoDB instance. Databases are organized into collections which contain documents. Documents contain literal data such as strings, numbers, dates, etc. in a JSON-like format.
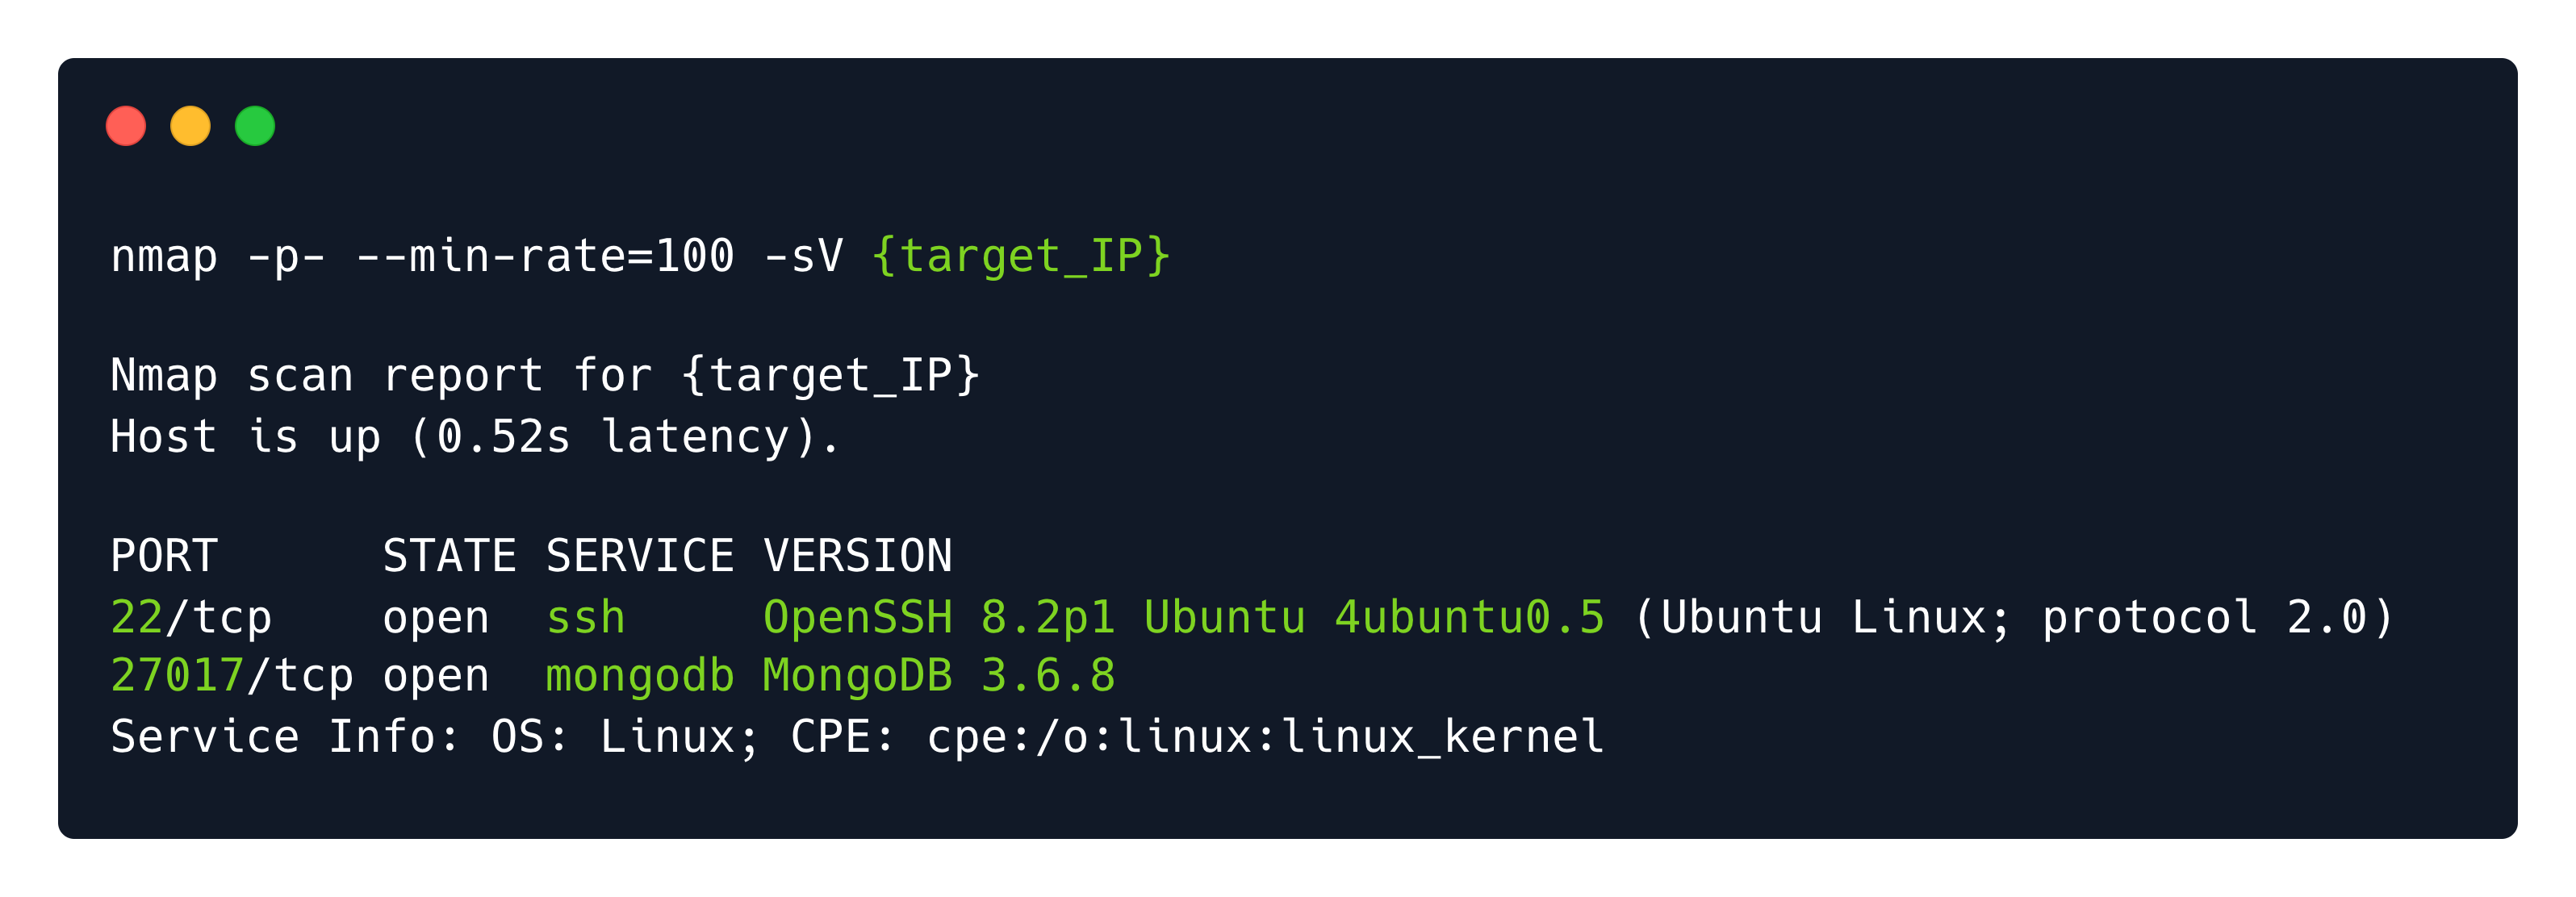
I found a MongoDB instance available on port 27017, I used to use it a lot when I was a developer back in 2018. It can allow anonymous login without username or password, so we'll try to connect to it using the mongosh command line tool.
mongosh mongodb://<target's ip>:27017Once inside you can use show dbs; to list the databases. use <database>; to select one. show collections; for further enumeration and db.<collection>.find().pretty(); to dump the contents of the documents presented in said collection.
Port 873: Rsync
Previously we talked a little bit about FTP used for copying entire files over the network from a remote server. But in many cases there is a need to transfer only some changes made to a few files and not to transfer every file every single time. For these scenarios, the rsync protocol is generally preferred.
The changes that need to get transfered are called deltas. Using deltas to update files is an extremely efficient way to reduce the required bandwidth for the transfer as well as the required time for the transfer to complete.
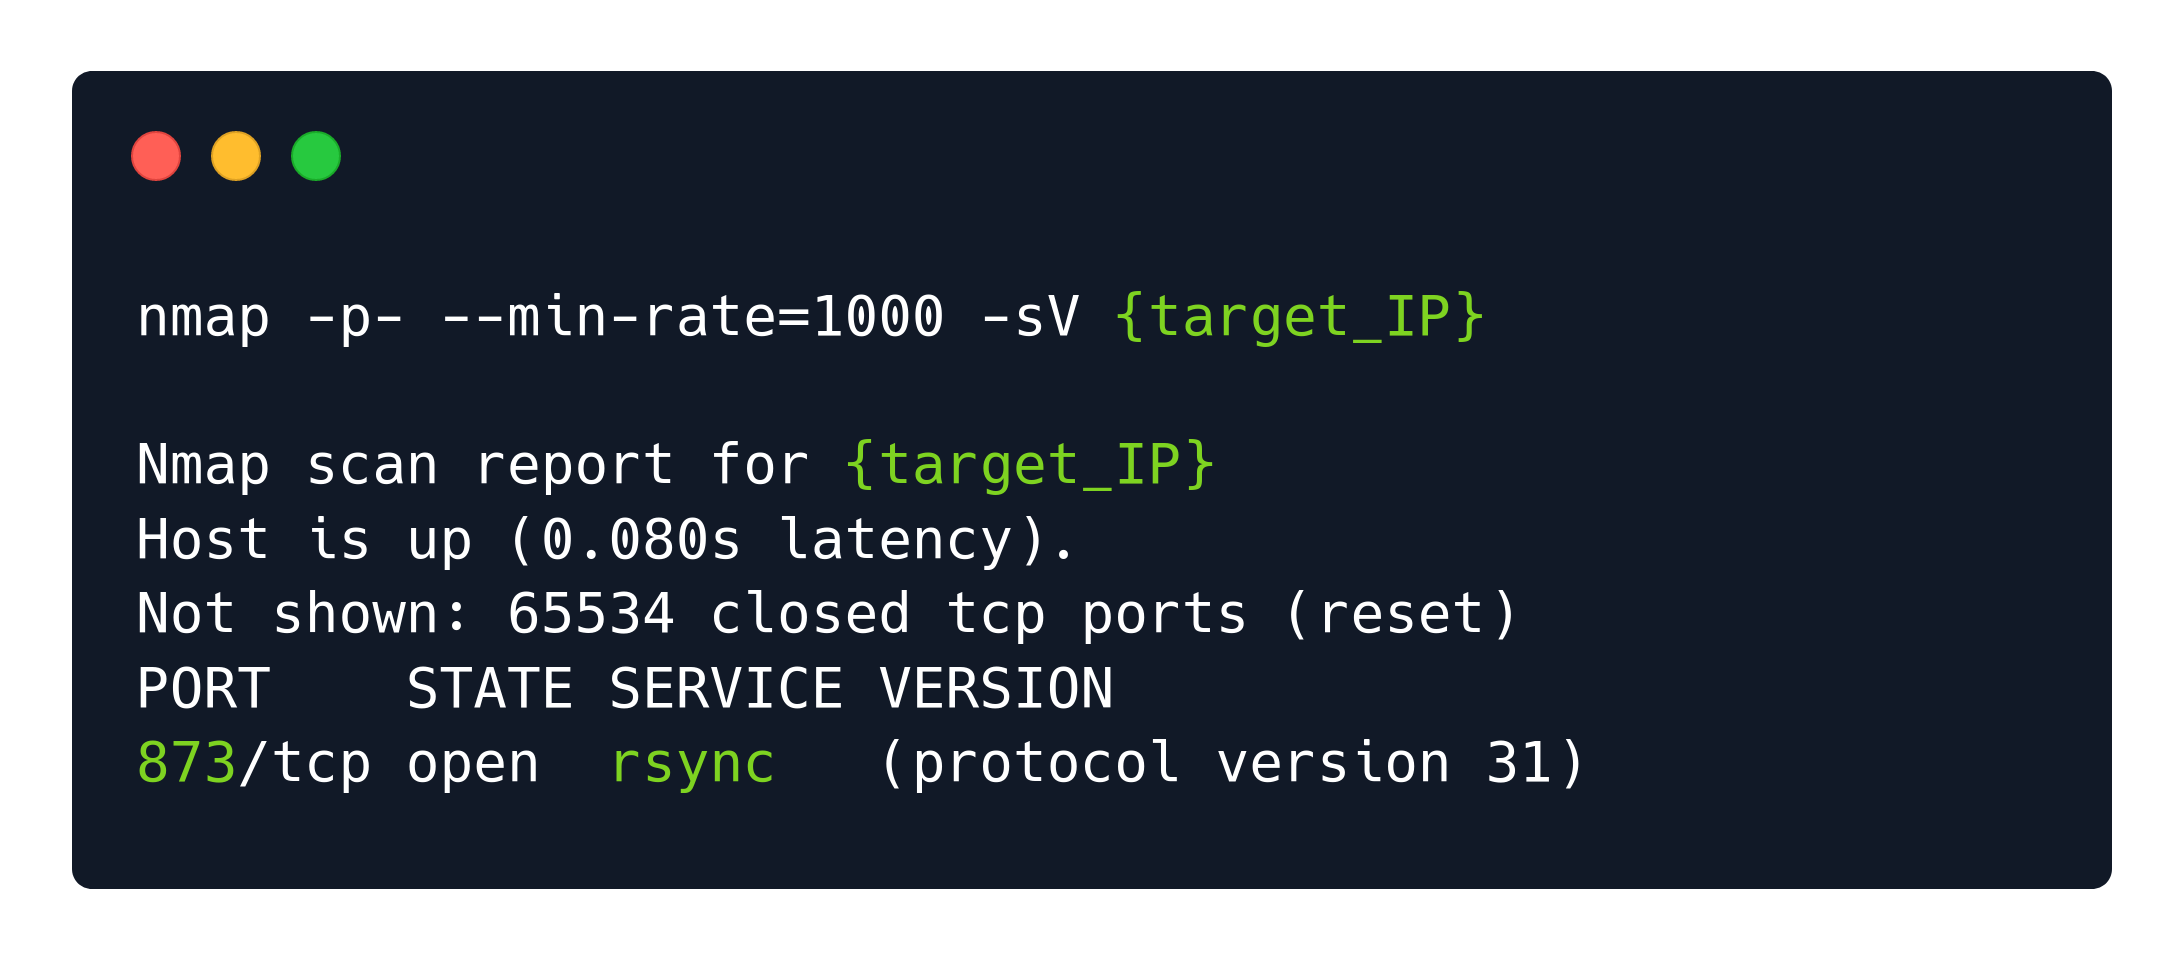
It often happens that rsync is misconfigured to permit anonymous login, which can be exploited by an attacker to get access to sensitive information stored on the remote machine.
First we'll check the availble directories without copying them.
rsync --list-only <target's ip>::If we are returned with any directory that is available, we tweak the command again to list the files inside the available shares
rsync --list-only <target's ip>::<share>If you find any files that caught your attention your can copy the fie to your local machine
rsync <target's ip>::<share>/<file> ./output.txtConclusion
I’ve tried a bunch of study methods—digital notes, handwriting commands in a special notebook—but nothing stuck. So I’m trying something new this time: writing an article every time I learn something new. That’s what this blog is for. To write what I feel like writing.
Now stop mumbling and keep studying with me.
Happy Hacking! See you in Tier 1.